Gameboy Graphics: The Background, Window, and Sprites
When it comes to gameboy graphics, there are 3 major components. The first 2 components are the window and background “layers”. The third major component are sprites. These 3 components make up all the graphics for all gameboy games. The data for each of these 3 components is stored in the Gameboy’s VRAM.
The following lines can be used to show or hide The Background, Window, or (all) sprites.
					// Show (all) Sprites, The Background, or the Window
SHOW_SPRITES;
SHOW_BKG;
SHOW_WIN;

// Hide (all) Sprites, The Background, or the Window
HIDE_SPRITES;
HIDE_BKG;
HIDE_WIN;
What is VRAM?
VRAM stands for “Video RAM”. Before we get into how to display backgrounds and sprites, the topic of VRAM must be shortly explained.
For Gameboy graphics, it is a essentially a variable collection of 8x8px tiles. There is a dedicated space in VRAM for sprites, and another dedicated space in VRAM for the background/window (they share this space). Both spaces can have a maximum of 256 tiles. The contents of these spaces can be changed at any time.
For ANYTHING to be displayed on screen, it must be stored in VRAM first. Everything you see on screen maps to a VRAM tile.
The Background & Window Layers
Gameboy games have 2 display “layers”. These layers are the window and the background. The window is always drawn over the background. They can both be turned on/off and/or moved, individually, freely.
The background and window layers are tile maps, made of 8×8 sized tiles. Each layer is 32 tiles wide, and 32 tiles high. This makes their overall max size in pixels 256x256px. The background and window layers do not support transparency, and they occupy the same VRAM space. (This means that the window and background will use the same tiles). The background and window can be moved freely.
The Gameboy screen is 160px by 144px. The contents of the background and window will wrap around when they exceed the 256px mark vertically and/or horizontally. Here is an awesome video that explains more about the background and window on the Gameboy.
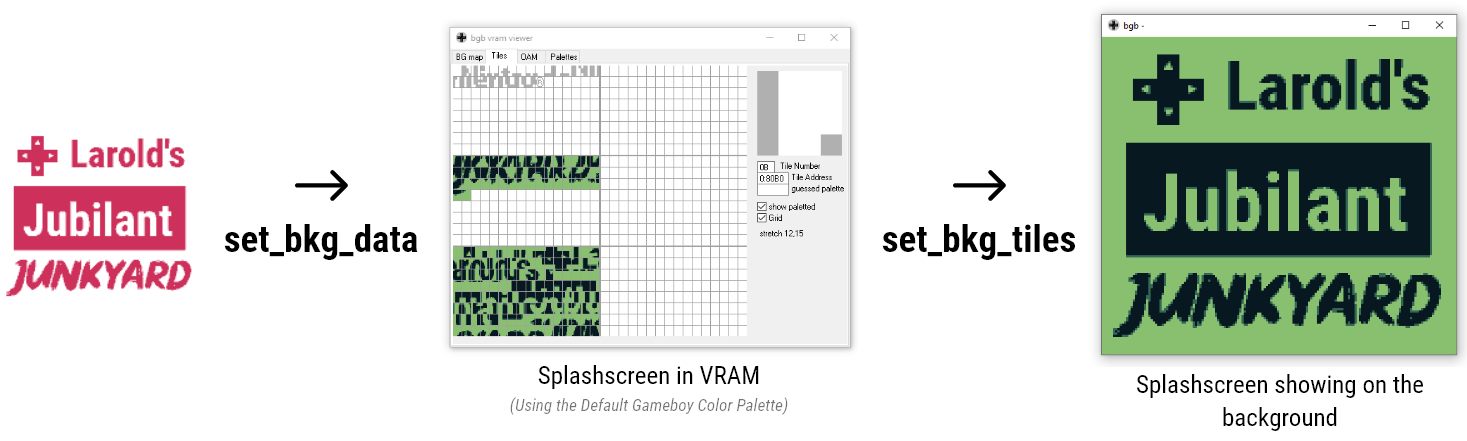
There are two main steps for showing something on the background/window.
- Placing the image data into VRAM using the “set_bkg_data” function.
- Using the “set_bkg_tiles“/”set_win_tiles” to actually show those tiles on the background/window respectively
Placing background/window tiles into VRAM
- The first parameter is where in VRAM to start placing the tile.
- The second parameter is how many tiles to place in VRAM
- The Third parameter is a pointer to the actual tiledata. I have a tutorial on understanding the GBDK/Gameboy Tileformat
Usage of the “set_bkg_data” function looks like this:
					// Load & set our background data
set_bkg_data(0,178,LaroldsJubilantJunkyard_data);
The above code snippet sets 178 tiles (defined in the ‘LaroldsJubilantJunkyard_data‘ variable) in VRAM. These tiles will start at 0, and end at 177. This snippet ONLY put’s the tiles in VRAM, it does not actually place them on the background/window. The “set_win_tiles” and “set_bkg_tiles” functions are responsible for making tiles visible on the screen.
NOTE: Changing the tiles stored in VRAM will change what’s displayed on the screen immediately, and with un-predictable results if not planned.
Showing tiles on the background/window
// The gameboy screen is 160px wide by 144px tall
// We deal with tiles that are 8px wide and 8px tall
// 160/8 = 20, and 144/8 = 18
set_bkg_tiles(0,0,20,18,LaroldsJubilantJunkyard_map);
- The x position on the screen/background (In tiles, not pixels)
- The y position on the screen/background. (In tiles, not pixels)
- How many tiles wide the rectangle is.
- How many tiles tall the rectangle is.
- The list of which VRAM tiles to place. (The size of this list must be equal to the product of the previous two parameters)
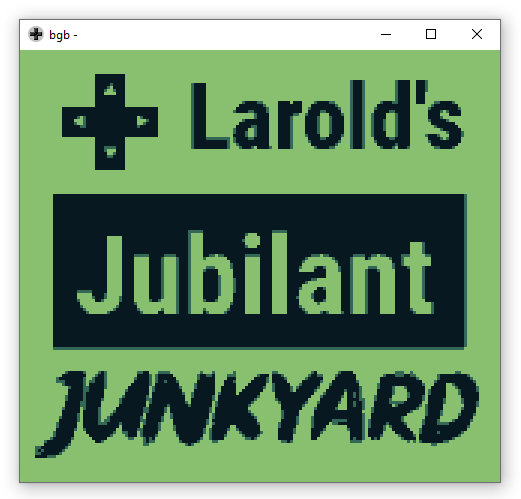
The “Larold’s Jubilant Junkyard” splashscreen is 160 pixels high, and 144 pixels wide. In tiles it is 20 tiles wide, and 18 tiles high. This makes 360 non-unique tiles. When the duplicate tiles are removed, we are left with 178 unique tiles.
The previously used “LaroldsJubilantJunkyard_data” variable has the data for 178 unique tiles. These tiles are stored in VRAM. The “LaroldsJubilantJunkyard_map” variable has 360 values. Each value points to a specific tile in VRAM.
Moving the Background and Window layers
					    // Move the window TO x-coordinate: 7, y-coordinate: -80
    move_win(7,80);

    // Move the background TO x-coordinate: 7, y-coordinate: -80
    move_bkg(7,80);

    // Move the window to the right 1 pixel, and down 3 pixels
    scroll_win(1,3);

    // Move the background to the right 1 pixel, and down 3 pixels
    scroll_bkg(1,3);

In the comments I made sure to point out the difference that the “move_” functions will set the location of the background/window to the exact values specified. Where as the “scroll_” functions are used for nudging the background in a given direction.
The background “wraps around”. Part of it will always be shown. Once a tile goes to far to one side, it will show up on the other side.
Simple HUD Strategy
If you recall, the window appears OVER the background. Also, neither the window or the background can be transparent. This creates a certain problem. If Both are showing at the same location, the window will always cover the background (and often sprites too, unless explicitly positioned over the window).
The solution we see in many games is to move the window down or up, so only a part of it is showing.
Gameboy Graphics - Sprites
Sprites are different from the window/background layers. They represent smaller individual objects. These can be positioned above both window and background, BELOW both window and background, or between the two. Each “sprite” is 8 pixels in width. As for height, sprites can be 8 or 16 pixels high. A sprite can represent a single object on screen, or multiple sprites can combine to represent a single larger object on screen. Sprites can have their own unique per-pixel position. In addition, sprites can be flipped horizontally and vertically. Below are examples of things that are sprites are used for:
- The Player
- Enemies
- Bullets & Projectiles
- Powerups
The Gameboy supports a maximum of 40 sprite objects. Because of the 40 object limitation, different strategies must be used to achieve certain game design elements.
Placing sprite data into VRAM
To put tile data in VRAM for sprite objects we must use the “set_sprite_data” function. This function is exactly like the “set_bkg_data” function. The only exception is that it uses a different chunk of VRAM. This function takes in 3 parameters.
- The first parameter is where in VRAM to start placing the tile.
- The second parameter is how many tiles to place in VRAM
- The Third parameter is a pointer to the actual tiledata. I have a tutorial on understanding the GBDK/Gameboy Tileformat
The “set_sprite_data” does not target a specific sprite. The data it sets in VRAM is shared by all sprites. Example usage of the function looks like this:
					// Set 5 sprites (defined in 'PlayerSprite') in VRAM, starting at 0
set_sprite_data(0,5,PlayerSprite);
Assigning a sprite to VRAM tiles
- Which sprite from 0 to 40
- Which tile in VRAM
Here is an example of using that function:
					// Set the first sprite (sprite 0) to use tile 0
set_sprite_tile(0,0);
Moving your sprites around
- The index of the sprite (from 0 to 39)
- The horizontal value
- The vertical value