
GBDK-2020 comes with a lot helpful tools. One of my favorite is called png2asset. This tool takes in a PNG image and converts it to file formats you can use with GBDK-2020.
This tutorial is a part of my How to make a Gameboy Game tutorial series. If you haven’t already, check out those tutorials to learn how to make games using GBDK-2020.
You can find the png2asset executable in the GBDK/bin folder. When you execute this program, you pass in your PNG file first, followed by various arguments (all depending on your needs).
Here are all of the arguments for png2asset from the gbdk-2020 documentation:
usage: png2asset    <file>.png [options]
-c                  ouput file (default: <png file>.c)
-sw <width>         metasprites width size (default: png width)
-sh <height>        metasprites height size (default: png height)
-sp <props>         change default for sprite OAM property bytes (in hex) (default: 0x00)
-px <x coord>       metasprites pivot x coordinate (default: metasprites width / 2)
-py <y coord>       metasprites pivot y coordinate (default: metasprites height / 2)
-pw <width>         metasprites collision rect width (default: metasprites width)
-ph <height>        metasprites collision rect height (default: metasprites height)
-spr8x8             use SPRITES_8x8
-spr8x16            use SPRITES_8x16 (this is the default)
-spr16x16msx        use SPRITES_16x16
-b <bank>           bank (default 0)
-keep_palette_order use png palette
-noflip             disable tile flip
-map                Export as map (tileset + bg)
-use_map_attributes Use CGB BG Map attributes
-use_nes_attributes Use NES BG Map attributes
-use_nes_colors     Convert RGB color values to NES PPU colors
-use_structs        Group the exported info into structs (default: false) (used by ZGB Game Engine)
-bpp                bits per pixel: 1, 2, 4 (default: 2)
-max_palettes       max number of palettes allowed (default: 8)
                    (note: max colors = max_palettes x num colors per palette)
-pack_mode          gb, sgb, sms, 1bpp (default: gb)
-tile_origin        tile index offset for maps (default: 0)
-tiles_only         export tile data only
-maps_only          export map tilemap only
-metasprites_only   export metasprite descriptors only
-source_tileset     use source tileset (image with common tiles)
-keep_duplicate_tiles   do not remove duplicate tiles (default: not enabled)
-bin                export to binary format
-transposed         export transposed (column-by-column instead of row-by-row)
We can separate these arguments into three categories
- Arguments for Converting Sprites
- Arguments for Converting Backgrounds
- Arguments for both Sprites & Backgrounds
There are a lot of different combinations, so I’ll try to handle the most common. I’ll also discuss the most common example cases for png2asset and tile data. Some arguments are specifically for Zal0’s ZGB engine. I’ll avoid discussing those as well.
The Basics
Here are the basics of png2asset usage. We can split our path in two:
- Converting backgrounds
- Converting metasprites
Converting a background using png2asset
The first common png2asset example is for converting backgrounds. This could be for a menu, a splash screen, or for a level.
For converting a background, you need to first pass the “-map” argument. This tells png2asset that we are not dealing with sprite sheets.
png2asset MyTargetBackgroundImage.png -mapThat command will create “MyTargetBackgroundImage.c” and “MyTargetBackgroundImage.h” right next to the “MyTargetBackgroundImage.png” file. Here’s how the .c file would look:
NOTE: I’ve omitted some of the values to avoid crowding the page
//AUTOGENERATED FILE FROM png2asset

#include <stdint.h>
#include <gbdk/platform.h>
#include <gbdk/metasprites.h>

BANKREF(MyTargetBackgroundImage)

const palette_color_t MyTargetBackgroundImage_palettes[4] = {
	RGB8(255,255,255), RGB8(  0,  0,  0), RGB8(255,255,255), RGB8( 73,110,116)

};

const uint8_t MyTargetBackgroundImage_tiles[32] = {
	...
};


const unsigned char MyTargetBackgroundImage_map[360] = {
	...
};
And here’s how the .h file would look:
NOTE: You should use the macro constants defined in the .h file below instead of their actual values. That way, any changes to your graphics don’t break your game.
//AUTOGENERATED FILE FROM png2asset
#ifndef METASPRITE_MyTargetBackgroundImage_H
#define METASPRITE_MyTargetBackgroundImage_H

#include <stdint.h>
#include <gbdk/platform.h>
#include <gbdk/metasprites.h>

#define MyTargetBackgroundImage_TILE_ORIGIN 0
#define MyTargetBackgroundImage_TILE_W 8
#define MyTargetBackgroundImage_TILE_H 8
#define MyTargetBackgroundImage_WIDTH 160
#define MyTargetBackgroundImage_HEIGHT 144
#define MyTargetBackgroundImage_TILE_COUNT 2
#define MyTargetBackgroundImage_PALETTE_COUNT 1
#define MyTargetBackgroundImage_COLORS_PER_PALETTE 4
#define MyTargetBackgroundImage_TOTAL_COLORS 4
#define MyTargetBackgroundImage_MAP_ATTRIBUTES MyTargetBackgroundImage_map_attributes
#define MyTargetBackgroundImage_MAP_ATTRIBUTES_WIDTH 20
#define MyTargetBackgroundImage_MAP_ATTRIBUTES_HEIGHT 18
#define MyTargetBackgroundImage_MAP_ATTRIBUTES_PACKED_WIDTH 20
#define MyTargetBackgroundImage_MAP_ATTRIBUTES_PACKED_HEIGHT 18

BANKREF_EXTERN(MyTargetBackgroundImage)

extern const palette_color_t MyTargetBackgroundImage_palettes[4];
extern const uint8_t MyTargetBackgroundImage_tiles[32];

extern const unsigned char MyTargetBackgroundImage_map[360];
extern const unsigned char MyTargetBackgroundImage_map_attributes[360];

#endif
If you wanted to change the location or output filename, you can use the “-c <file-path>” argument.
png2asset MyTargetBackgroundImage.png -map -c /some/other/location/MyCreatedAsset.cThis will create a “MyCreatedAsset.c” and “MyCreatedAsset.h” in a folder named “/some/other/location”. As a result, all of your variables would be renamed too.
...

extern const palette_color_t MyCreatedAsset_palettes[4];
extern const uint8_t MyCreatedAsset_tiles[32];

extern const unsigned char MyCreatedAsset_map[360];
extern const unsigned char MyCreatedAsset_map_attributes[360];
Converting a colored background
If the tiles in your background use different palettes, you’ll want to export an array of tilemap attributes. You can tell png2asset to do this using the “-use_map_attributes” argument.
png2asset MyTargetBackgroundImage.png -map -use_map_attributesNow, you’ll notice an extra array of bytes called “MyTargetBackgroundImage_map_attributes”.
const unsigned char MyTargetBackgroundImage_map_attributes[360] = {
	...
};
Each element in this array corresponds 1-for-1 with elements in the “MyTargetBackgroundImage_map” array. The bit’s of each byte in this array specify each tilemap tile’s:
- horizontally flip status
- vertical flip status
- palette used
The final argument, if you want DMG support, you’ll need to turn off tile flipping with the “-noflip” argument.
Tile flipping is enabled by default. png2asset will compare tiles it reads in the PNG file, and see if they are identical except flipped (horizontally and/or vertically). This reduces the amount overall tiles exported. Which can be helpful when you have a complicated background.
To turn off tile flipping, you can use the “-noflip” argument like this.
png2asset MyTargetBackgroundImage.png -map -use_map_attributes -noflipIndexed Color Palettes
PNG to asset can automatically generate palettes for your game. If your PNG has a indexed color palette embedded inside of it, You can use the “-keep_palette_order” argument about it.
NOTE: Your color palette must be a multiple of 4 for Gameboy games. You can also have no more than 8 different color palettes.
NOTE: If you have colors from 2 or more different palettes in a single tile, PNG2asset will fail.
png2asset MyTargetBackgroundImage.png -map -use_map_attributes -keep_palette_orderSetting the Starting Tilemap Index
By default, png2asset will assume the tilemap indices should start at 0. However , often you’ll have something else at the start VRAM. In this case, you can use the “-tile_origin” argument to offset values by a specified amount:
png2asset MyPNGFile.PNG -c where/i/want/my/FinalFile.c -map -tile_origin 40The above will offset all tilemap indices by 40. This is great if you have fonts or gui tiles at the start of VRAM.
If you help drawing backgrounds, check out my tutorial for drawing background to learn how. I’ve also got a YouTube video on the same topic.
Converting a sprite sheet to metasprites using png2asset
Gameboy hardware sprites come in two sizes, 8×8 and 8×16. That’s perfectly fine for small things like bullets. However, that does not suffice for larger objects. A “metasprite” is a single object that is rendered using multiple hardware sprites.
PNG2asset is in “metasprite mode” by default, so you won’t need a specific argument to enable it (like you did with backgrounds).
The first two arguments to note, are for the size of each individual sprite in your sprite-sheet. The “-sw <width>” and “-sh <height>” arguments will let you specify that size.
NOTE: Your sprite-sheet should not have any spacing between sprites. That is not yet supported.
If each sprite in our sprite sheet was 32×32 in size, we could do the following:
png2asset MyTargetSpriteSheet.png -sw 32 -sh 32When run, you’ll end up with a MyTargetSpriteSheet.c file like this:
//AUTOGENERATED FILE FROM png2asset

#include <stdint.h>
#include <gbdk/platform.h>
#include <gbdk/metasprites.h>

BANKREF(MyTargetSpriteSheet)

const palette_color_t MyTargetSpriteSheet_palettes[8] = {
	RGB8(255,255,255), RGB8(207,207,207), RGB8(104,104,104), RGB8(  0,  0,  0)
	,
	RGB8(255,255,255), RGB8( 13,  0,  0), RGB8(  4,  0,  1), RGB8(224,218,  0)

};

const uint8_t MyTargetSpriteSheet_tiles[512] = {
	...

};

const metasprite_t MyTargetSpriteSheet_metasprite0[] = {
	METASPR_ITEM(-16, -16, 0, 0), METASPR_ITEM(0, 8, 2, 0), METASPR_ITEM(0, 8, 2, 32), METASPR_ITEM(0, 8, 0, 32), METASPR_ITEM(16, -24, 4, 0), METASPR_ITEM(0, 8, 6, 0), METASPR_ITEM(0, 8, 6, 32), METASPR_ITEM(0, 8, 4, 32), METASPR_TERM
};

const metasprite_t MyTargetSpriteSheet_metasprite1[] = {
	METASPR_ITEM(-16, -16, 8, 0), METASPR_ITEM(0, 8, 10, 0), METASPR_ITEM(0, 8, 12, 0), METASPR_ITEM(0, 8, 14, 0), METASPR_ITEM(16, -24, 8, 64), METASPR_ITEM(0, 8, 10, 64), METASPR_ITEM(0, 8, 12, 64), METASPR_ITEM(0, 8, 14, 64), METASPR_TERM
};

const metasprite_t MyTargetSpriteSheet_metasprite2[] = {
	METASPR_ITEM(-16, -16, 16, 1), METASPR_ITEM(0, 8, 18, 1), METASPR_ITEM(0, 8, 20, 1), METASPR_ITEM(0, 8, 22, 1), METASPR_ITEM(16, -24, 24, 1), METASPR_ITEM(0, 8, 26, 1), METASPR_ITEM(0, 8, 28, 1), METASPR_ITEM(0, 8, 30, 1), METASPR_TERM
};

const metasprite_t* const MyTargetSpriteSheet_metasprites[3] = {
	MyTargetSpriteSheet_metasprite0, MyTargetSpriteSheet_metasprite1, MyTargetSpriteSheet_metasprite2
};
Alongside that .c file, you’d have a matching .h file:
NOTE: You should use the macro constants defined in the .h file below instead of their actual values. That way, any changes to your graphics don’t break your game.
//AUTOGENERATED FILE FROM png2asset
#ifndef METASPRITE_MyTargetSpriteSheet_H
#define METASPRITE_MyTargetSpriteSheet_H

#include <stdint.h>
#include <gbdk/platform.h>
#include <gbdk/metasprites.h>

#define MyTargetSpriteSheet_TILE_ORIGIN 0
#define MyTargetSpriteSheet_TILE_W 8
#define MyTargetSpriteSheet_TILE_H 16
#define MyTargetSpriteSheet_WIDTH 32
#define MyTargetSpriteSheet_HEIGHT 32
#define MyTargetSpriteSheet_TILE_COUNT 32
#define MyTargetSpriteSheet_PALETTE_COUNT 2
#define MyTargetSpriteSheet_COLORS_PER_PALETTE 4
#define MyTargetSpriteSheet_TOTAL_COLORS 8
#define MyTargetSpriteSheet_PIVOT_X 16
#define MyTargetSpriteSheet_PIVOT_Y 16
#define MyTargetSpriteSheet_PIVOT_W 32
#define MyTargetSpriteSheet_PIVOT_H 32

BANKREF_EXTERN(MyTargetSpriteSheet)

extern const palette_color_t MyTargetSpriteSheet_palettes[8];
extern const uint8_t MyTargetSpriteSheet_tiles[512];

extern const metasprite_t* const MyTargetSpriteSheet_metasprites[3];

#endif
Like with backgrounds, if you want the final .c and .h files in a different location, we can tell png2asset where to output our resultant files with the “-c <file-path>” argument.
png2asset MySpriteSheet.png -c Some/Location/MyObject.c -sw 32 -sh 32If you want to change the pivot point of your metasprites, you can use the “-px <value>” and “-py <value>” arguments.
png2asset MySpriteSheet.png -c Some/Location/MyObject.c -sw 32 -sh 32 -px 16 -py 0Changing your metasprites’ pivot point will affect how it behaves when flipped around. By default, the pivot point is in the center of the metasprite. This will suffice for most cases, so you wont need those two arguments much
When making game boy games, You have to choose if your game’s hardware sprites are in 8×8 mode, or 8×16 mode. PNG2asset by default, assumes sprites are in 8×8 mode. If your games’ sprites will be 8×16 , you should also pass the “-spr8x16” argument into png2asset.
png2asset MySpriteSheet.png -sw 32 -sh 32 -spr8x16Sega Master System and/or Game Gear do not support tile flipping/mirroring for sprites. So, If you’re making games for either, you should disable sprite flipping with the “-noflip” argument.
png2asset MySpriteSheet.png -sw 32 -sh 32 -spr8x16 -noflipJust like with backgrounds, you can also use the “-keep_palettte_order” argument with metasprites too.
NOTE: Beware, a given sprite can only use 1 color palette.
Also, as of 5/29/2023, png2asset does not support layering either.
png2asset MySpriteSheet.png -sw 32 -sh 32 -spr8x16 -keep_palette_orderTile Data Exporting
For both sprites and backgrounds, png2asset will export tile data for the provided PNG. This will be an array of 8-bit unsigned integers, that you can use to put tiles in VRAM for sprites or backgrounds.
You can disable the exporting of tile data using one of the following two arguments:
- -maps_only – excludes tile data exporting when converting background tilemaps.
- -metasprites_only – excludes tile data exporting when converting a spritesheet to metasprites
This is specifically useful if you have multiple tilemaps that use the same tileset. You can export the tileset once, and disable exporting of the tile data for each individual tilemap.
NOTE: If your tilemap has any extra tiles in it, you’ll need to import those separately from the tiles in the tileset. This is a feature, not a bug. It let’s you define common and specific tiles.
Below, I’ll give basic explanations for the most common arguments.
Other Notable Arguments
Bank Selection
You can use the bank argument, “-b <value-here>“, to add a pragma at the top of each .c file. With that argument and pragma, The GBDK will know to place your asset in the bank specified.
More info on Banking with GBDK-2020 can be found here
For example, if you wanted something placed in bank 5:
png2asset MyPNGFile.PNG -b 5NOTE: If you are using GBDK-2020’s autobanking feature, you should pass 255 as the bank
Source Tilesets
All graphics in gameboy games are made using 8×8 tiles. PNG2asset can read these graphics from your image file for you. However, sometimes it’s useful to manually pass in a source tileset. This is done using the “-source_tileset <path-to-png>” argument.
Why would someone want to do this? So you know exactly the order tiles will be in VRAM. I use this argument when i’m creating levels external map editors like Tiled or LDtk. I’ll export the level as a PNG, and then use png2asset to convert it to .c and .h files.
If you use this argument, you’ll need to run the png2asset program also on your source tileset too. During such, you can tell it not to output any tilemap or metasprite information using the “-tiles_only” argument
An GUI-Based, Legacy Alternative: GBTD & GBMB
If all of this is confusing for you, maybe you’ll enjoy a more GUI-based solution.
GBTD and GBMB are Two popular legacy tools for creating gameboy graphics . They are a delphi visual designers for creating tiles and maps. The most up-to-date version is under the gbdk github repo.
I’ll quote the original website (GBTD page, and GBMB page) some:
With the Gameboy Tile Designer (“GBTD”), you can draw tiles which you can incorporate in your own Gameboy productions.
http://www.devrs.com/gb/hmgd/gbtd.html
With GBTD, you can design tiles in different sizes, including 8×8, 8×16, 16×16 and 32×32, both in standard Gameboy, as well as colors for the Super Gameboy and Gameboy Color. Examples can be shown as separate and in a group. Resizing is easy; simply select a different size from the menu, and GBTD will remap all tiles. All other tiles are shown and selected visually, making navigating through your tiles a snap. GBTD also has Flood fill, flipping, scrolling, rotating and Undo-support, to give your design-time that extra punch you are looking for.
With the Gameboy Map Builder (“GBMB”), you can make maps which you can incorporate in your own Gameboy productions.
http://www.devrs.com/gb/hmgd/gbtd.html
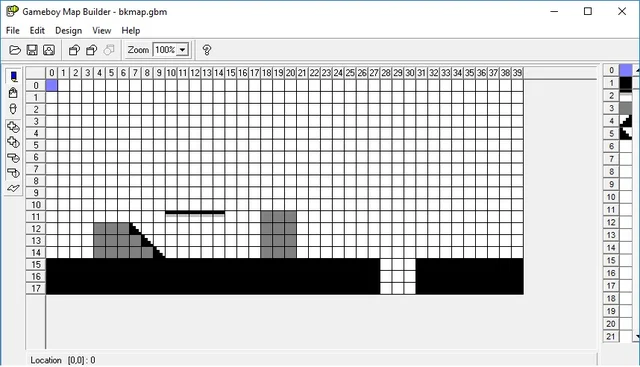
GBMB gives you a large (1024 x 1024 tiles max) canvas on which you can draw tiles made by GBTD, which supports any tile size and color GBTD can handle. This can be used for map or level-design. Next to that, this canvas can easily be used for other purposes, like still pictures. Options like five levels of zooming and a fully resizable window help you with looking at your design in any way you want. Also, with build-in support for Gameboy Color-extensions like vertical/ horizontal flip and 768 tiles per tileset, GBC-development is a snap.
http://www.devrs.com/gb/hmgd/gbmb.html
You can find the latest GBTD & GBMB releases under the gbdk-2020 github project:
https://github.com/gbdk-2020/GBTD_GBMB
Common Causes of Failure when using PNG2Asset
Program’s aren’t magical, wrong inputs can cause various types of failure. Here are some common causes of failure to look out for.
For your images aren’t properly sized, PNG2assset will fail
For backgrounds, your image’s width and height must be a multiple of 8.
For metasprites, it depends on what size your sprites are:
- for 8×8 sprites, your image’s width and height must be a multiple of 8
- for 8×16 sprites, your image’s height must be a multiple of 16.
If any tile has more than 4 colors, png2asset will fail.
This is because a single Gameboy color palette can only have 4 different colors in it.
If more than 8 distinct palettes are found, png2asset will fail.
This is because the Gameboy only supports 8 different palettes for both backgrounds and sprites.
“-keep_palette_order” fill fail if the PNG does not have an indexed color palette.
With this mode, all colors used are indexed in an embedded color palette. If this argument is passed, and the PNG is not indexed, png2asset will fail.
“-keep_palette_order” fill fail if the PNG’s indexed color palette does not have the correct amount of colors.
The indexed color palette should be a multiple of 4, and contain no more than 32 different colors.
Your Backgrounds may not draw correctly, if you’ve placed a different asset ahead of them in VRAM. (TODO wording)
This isn’t a “failure”, but something common.
If you have a set of tiles that will go ahead of your asset in VRAM, you’ll need to tell PNG2asset to offset all the tilemap indices. Otherwise, your tilemap indices will point to different tiles than expected.
You can offset tilemap indices using the “-tile_origin <offset>” argument, or use the set_bkg_based_tiles/set_win_based_tiles functions.’
Conclusion
That’s pretty much it, when it comes to png2asset. There are a bunch more arguments, but they are less common. If you need more assistance, feel free to send me an email or tag me on discord (gbdev or gbdk/zgb).
I’ll make a video explanation of this in the future, subscribe to my YouTube channel to stay up-to-date on that.