For all Game Boy games, hardware sprites can be 8×8 or 8×16 in size. This works fine for small things, like bullets in a shooter. However, very often you’ll need/want larger objects. This is where metasprites come into play. A “Metasprite” is simply a group of normal sprites that together represent one single object.
In this tutorial I’ll show you how to create metasprites, and how to use them. Alternatively, There is a GBDK-2020 example on creating metasprites. This example comes with the library. You can view the source code for the example here. If you aren’t familiar with drawing sprites with GBDK, check out this tutorial.
I also have a video version of this video for audio-visual learners.
Metasprite Definitions
To create a “metasprite” in GBDK, you need a constant array of “metasprite_t” structs. A “metasprite_t” struct has 4 fields:
- dy – (int8_t) Y coordinate of the sprite relative to the metasprite origin (pivot)
- dx – (int8_t) X coordinate of the sprite relative to the metasprite origin (pivot)
- dtile – (uint8_t) Start tile relative to the metasprites own set of tiles
- props – (uint8_t) Property Flags
We can define Professor Oak from Pokemon‘s tile data and metasprite like so:
#include <gb/gb.h>
#include <gb/cgb.h>
#include <stdint.h>
#include <gb/metasprites.h>
const uint8_t ProfessorOak_tiles[64]={0x07,0x00,0x38,0x07,0x16,0x09,0x19,0x06,0x30,0x0f,0x54,0x2f,0x43,0x3d,0x52,0x3d,0xe0,0x00,0x10,0xe0,0xe8,0x10,0x18,0xe0,0x0c,0xf0,0x2a,0xf4,0xc2,0xbc,0x4a,0xbc,0x30,0x0f,0x69,0x17,0x97,0x68,0x93,0x6c,0x73,0x0d,0x23,0x1c,0x1f,0x00,0x3e,0x00,0x0c,0xf0,0x96,0xe8,0xe9,0x16,0xc9,0x36,0xce,0xb0,0xc4,0x38,0xf8,0x00,0x7c,0x00};
const metasprite_t ProfessorOak_metasprite[] = {
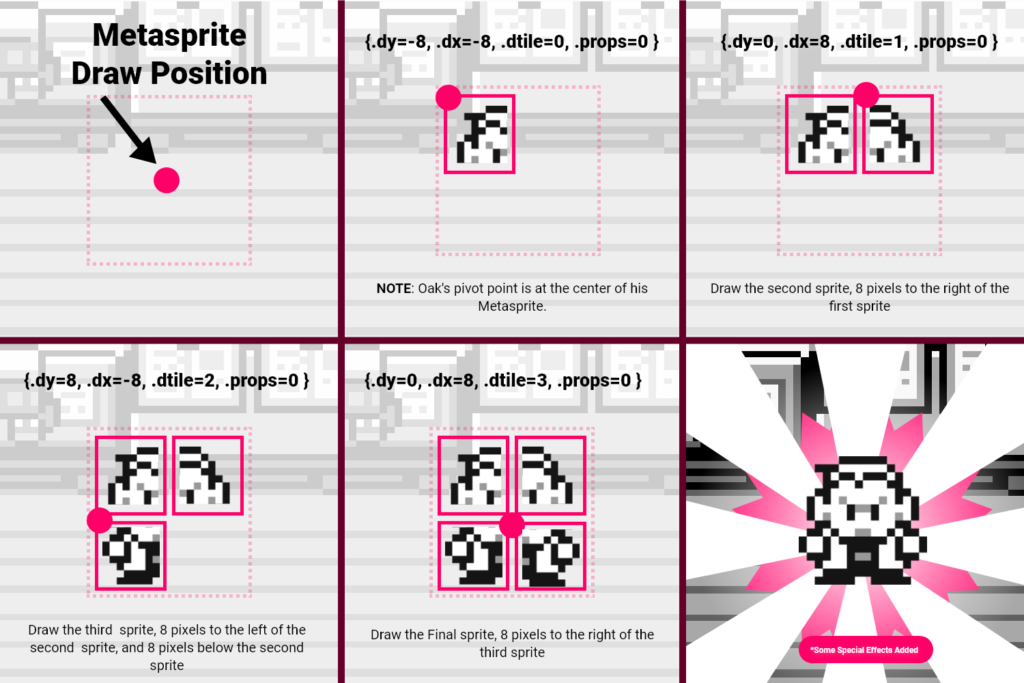
{.dy=-8, .dx=-8, .dtile=0, .props=0},
{.dy=0, .dx=8, .dtile=1, .props=0},
{.dy=8, .dx=-8, .dtile=2, .props=0},
{.dy=0, .dx=8, .dtile=3, .props=0},
METASPR_TERM
};
Special Thanks to The Spriters Resource for the Pokemon Red & Blue sprites. Here’s a visualization of what is going on in that code snippet.
The “dy” & “dx” Fields
Each “metasprite_t” struct in the array represents a single hardware sprite that will be drawn. The dy and dx fields are all relative to the previous hardware sprite’s draw position. In the case of the first drawn hardware sprite in a metasprite, its dy and dx are relative to the starting position you’ll pass when drawing that metasprite.
The “dtile” field
When you draw a metasprite, you’ll pass in a starting tile. The “dtile” field in each “metasprite_t” struct is relative to that starting tile. All of your tiles for a single object should be together in VRAM. If you pass where in VRAM the first tile is for your object, the resultant “dtile” fields will all be relative to that and have relatively low values.
The “props” field
The “props” field for “metasprite_t” structs are any additional properties you’d like to apply to hardware sprites that are drawn. The most common is flipping horizontally and/or vertically. However, you can use any value you might normally pass into set_sprite_props.
- Bit 7 – Priority flag. When this is set the sprites appear behind the background and window layer. (1 = behind)
- Bit 6 – Vertical flip. Dictates which way up the sprite is drawn vertically. (1 = upside down)
- Bit 5 – Horizontal flip. Dictates which way up the sprite is drawn horizontally. (1 = back to front)
- Bit 4 – DMG/Non-CGB Mode Only. Assigns either one of the two b/w palettes to the sprite. (1 = obj palette 1)
- Bit 3 – GBC only. Dictates from which bank of Sprite Tile Patterns the tile is taken. (1 = bank 1)
- Bit 0-2 – GBC only. Bits 0-2 indicate which of the 7 OBJ color palettes the sprite is assigned.
The array terminator
Since a “metasprite” is an array of “metasprite_t” structs, GBDK needs a way to know the end of this array. GBDK defines a “metasprite_end” macro to simplify this. This macro simply equates to -128. When passing it alone in a “metasprite_t” struct definition , it sets that struct’s dy value to -128. You can alternatively just use the METASPRITE_TERM macro.
When GBDK finds a “metasprite_t” struct, whose “dy” value is set to -128, it stops the metasprite drawing process.
Warning: Crazy & Unforeseeable things can happen if you don’t pass in a terminating element.
Functions for Drawing Metasprites
GBDK defines 4 main functions for drawing metasprites. Once you’ve defined your constant array of “metasprite_t” structs, you can pass it into one of these functions:
- move_metasprite_ex (the newer version of move_metasprite)
- move_metasprite_flipx (previously called move_metasprite_vflip)
- move_metasprite_flipy (previously called move_metasprite_hflip)
- move_metasprite_flipxy (previously called move_metasprite_hvflip)
The latter 3 functions will just flip the drawn metasprite on the x and/or y axes. These functions all take in the same parameters:
- metasprite – Pointer to the first struct of the metasprite (for the desired frame)
- base_tile – Number of the first tile where the metasprite’s tiles start
- base_prop – Base sprite property flags (can be used to set palette, etc)
- base_sprite – Number of the first hardware sprite to be used by the metasprite
- x – Absolute x coordinate of the sprite
- y – Absolute y coordinate of the sprite
The return value for these functions is simply the number of hardware sprites used to draw this metasprite.
We’ll use the above professor oak tile data and metasprite definition, and we’ll draw oak’s metasprite using the move_metasprite function.
Disclaimer: This tutorial is for educational purposes. The usage of Professor Oak is simply for eye candy and to give viewers an example they are likely to understand.
#include <gb/gb.h>
#include <gb/cgb.h>
#include <stdint.h>
#include <gb/metasprites.h>

const uint8_t ProfessorOak_tiles[64]={0x07,0x00,0x38,0x07,0x16,0x09,0x19,0x06,0x30,0x0f,0x54,0x2f,0x43,0x3d,0x52,0x3d,0xe0,0x00,0x10,0xe0,0xe8,0x10,0x18,0xe0,0x0c,0xf0,0x2a,0xf4,0xc2,0xbc,0x4a,0xbc,0x30,0x0f,0x69,0x17,0x97,0x68,0x93,0x6c,0x73,0x0d,0x23,0x1c,0x1f,0x00,0x3e,0x00,0x0c,0xf0,0x96,0xe8,0xe9,0x16,0xc9,0x36,0xce,0xb0,0xc4,0x38,0xf8,0x00,0x7c,0x00};

const metasprite_t ProfessorOak_metasprite[] = {
    {.dy=-8, .dx=-8, .dtile=0, .props=0},
    {.dy=0, .dx=8, .dtile=1, .props=0},
    {.dy=8, .dx=-8, .dtile=2, .props=0},
    {.dy=0, .dx=8, .dtile=3, .props=0},
	METASPR_TERM
};

void main(void)
{
    SHOW_SPRITES;

    // Not related to metasprites
    // This adjusts the DMG color palette so OAK has the proper colors
    OBP0_REG=DMG_PALETTE(DMG_DARK_GRAY,DMG_BLACK, DMG_WHITE,DMG_LITE_GRAY);

    // Oak has 4 tiles, put them in VRAM
    set_sprite_data(0,4,ProfessorOak_tiles);

    // Draw OAK's metasprite at 80,80
    // Start with the first tile in VRAM
    // Start with the first sprite
    move_metasprite_ex(ProfessorOak_metasprite,0,0,0,80,80);

    // Loop forever
    while(1) {

		// Done processing, yield CPU and wait for start of next frame
        wait_vbl_done();
    }
}
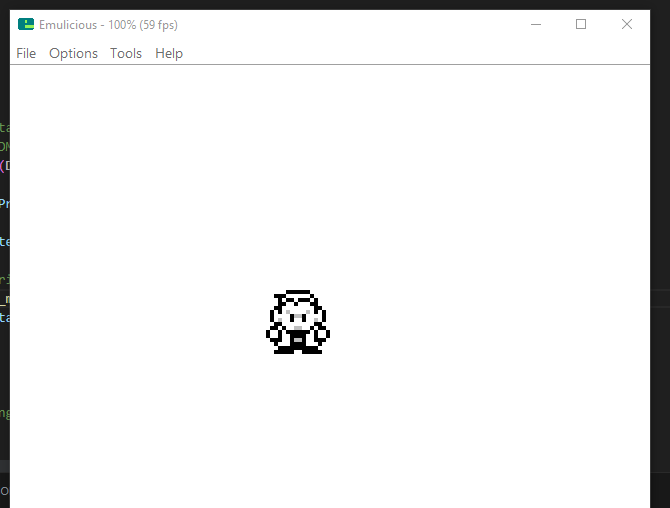
The output of that would look like this:
Metasprite Chaining
As previously stated, the return value for these functions is simply the number of hardware sprites used to draw this metasprite. It’s a good strategy to use this value and a counter variable for drawing multiple metasprites.
Recall, the fourth parameter passed into all of the functions is the “base sprite”. To achieve metasprite chaining:
- you just need to create a counter variable
- Increase the variable each time you draw a metasprite
- Use the newly increased value as the base sprite for the next sprite.
- Loop back around to #2 until you’ve drawn all the metasprites you need.
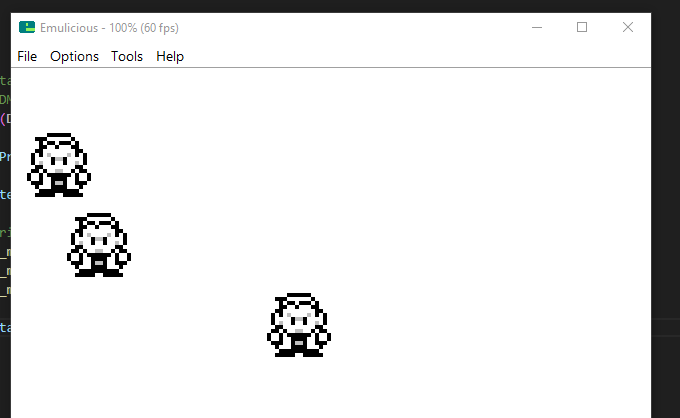
For example, if we wanted to draw professor oak 3 different times
...

void main(void)
{
    SHOW_SPRITES;

    // Not related to metasprites
    // This adjusts the DMG color palette so OAK has the proper colors
    OBP0_REG=DMG_PALETTE(DMG_DARK_GRAY,DMG_BLACK, DMG_WHITE,DMG_LITE_GRAY);

    set_sprite_data(0,4,ProfessorOak_tiles);

    uint8_t startingSprite = 0;

    // Using "startingSprite" the first time isn't neccessary, but i like the consistency
    startingSprite+=move_metasprite_ex(ProfessorOak_metasprite,0,0,startingSprite,80,80);
    startingSprite+=move_metasprite_ex(ProfessorOak_metasprite,0,0,startingSprite,20,40);
    startingSprite+=move_metasprite_ex(ProfessorOak_metasprite,0,0,startingSprite,30,60);

    // Loop forever
    while(1) {

		// Done processing, yield CPU and wait for start of next frame
        wait_vbl_done();
    }
}
This is the final result.
Hiding Remainder Sprites
The final topic to discuss involves hiding the remainder sprites. The number of hardware sprites in use is always fluctuating. If the amount of hardware sprites needed decreases, you can end up with weird-looking zombie remainder sprites.
This happens because GBDK will automatically draw any hardware sprite that is within the visible portion of the screen. GBDK and the Game Boy itself give you full control, and can’t know if you want that sprite there or not.
The solution is a function called “hide_sprites_range“. This function hides all sprites within a given range. It takes in 2 parameters:
- from – start OAM index
- to – finish OAM index (must be <= MAX_HARDWARE_SPRITES)
When chaining metasprite calls, when done, you should execute this function. During that execution, you pass it the final value for your counter variable, and the “MAX_HARDWARE_SPRITES” macro. This will prevent any extra sprites from lingering around on the screen.
//...

void main(){

    //...

    uint8_t startingSprite = 0;

    // Using "startingSprite" the first time isn't neccessary, but i like the consistency
    startingSprite+=move_metasprite_ex(ProfessorOak_metasprite,0,0,startingSprite,80,80);
    startingSprite+=move_metasprite_ex(ProfessorOak_metasprite,0,0,startingSprite,20,40);
    startingSprite+=move_metasprite_ex(ProfessorOak_metasprite,0,0,startingSprite,30,60);

    // Hide any remainder sprites
    hide_sprites_range(startingSprite,MAX_HARDWARE_SPRITES);

    //...
}
Easy Metasprite Creation with PNG2Asset
GBDK comes with a tool called PNG2Asset. This tool converts PNG image files to binary and .c/.h files, that are compatibile with GBDK. This allows you to develop Game Boy graphics using your favorite graphics editing programs.
PNG2Asset can export sprite sheets as arrays of metasprites. This greatly simplifies the process by removing the need to manually define each metasprite and it’s “metasprite_t” struct items.
For more information about PNG2Asset, you can check out the GBDK documentation here, or my own tutorial about it here.

Conclusion
That’s it for this tutorial. As always, feel free to leave a comment if you have any questions. You can alternatively reach out to me on social media, discord, or via email.